Scratch-building for beginners - page 3
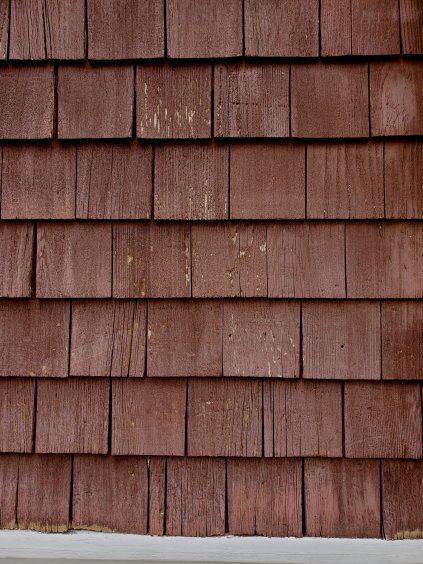
Once all the window and door cutouts have been made, it's time to apply the siding material. Aunt Estelle's house was sided with cedar shakes which had aged to a dark brown. To replicate
the shakes I used adhesive-backed straight-cut cedar shake shingles from
Rail Scale Models. I used three and a half packs to do the house.
The following instructions presume you, as I, are using the Rail Scale Models shingles identified above.
|
|
|
||||||
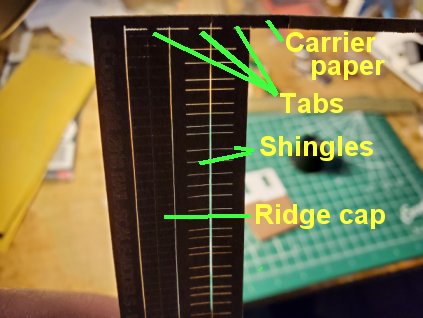
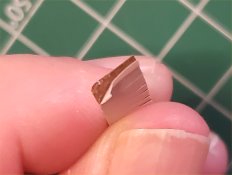
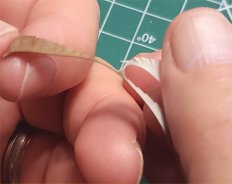
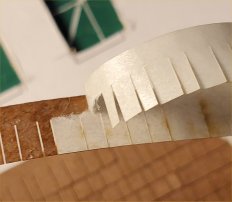
Begin by cutting two strips of shingles from the carrier paper. You will need to cut several small tabs to release the strips of shingles from the carrier. To strip the backing from a strip of shingles, bend a "dog ear" in one corner and separate the backing from the shingles. Use a pair of tweezers to begin stripping the backing from the shingles, then grasp the shingles between the thumb and forefinger of one hand and grasp the backing with your other hand; pull the two segments apart at a fairly sharp (but not too sharp) angle.
|
|
|
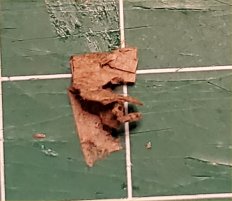
Be very careful when separating the shingles from the backing, as the backing is easy to tear and will leave remnants on the shingles - and it's almost impossible to get the torn backing off. If you do happen to start ripping the backing, STOP PULLING!. Begin the removal process from the other end of the strip of shingles and approach the area of the ripped backing slowly so as not to rip the backing a second time. Worst case scenario is you will waste the section of shingles to which the backing has stuck (hopefully it won't be much). And don't worry - you'll use all the sections of the shingles, as discussed below. OH - I forgot to mention: the shingles are VERY sticky and WILL stick to anything and everything they come in contact with. The picture below shows the end result of some shingles that stuck to my cutting mat - I had to scrape them off. If I haven't made my point yet, let me make it now: BE CAREFUL WITH THE SHINGLES!
|
|
Note that in addition to 14 strips of shingles, each sheet of shingle material includes one ridge cap. You will not need the ridge cap for this model.
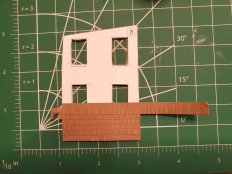
Begin applying the shingles by placing a row at the very bottom of the wall, aligning the bottom of the strip of shingles with the bottom of the wall. As stated above, you will use all the shingle material; see the next paragraph for instructions on how to do this. A note on overlapping the rows of shingles: the tabs on the Rail Scale Model shingles are a scale 12" long; prototype practice is to leave 6" exposed (at least on the house I live in now), so overlap the shingles by half - and stagger the joints as much as possible.
|
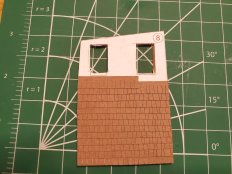
Notice in the photo captioned "Applying the shingles" that the application is starting to cover the window openings. In the photo captioned "Use all of the shingles", we see that the lower wndow openings are covered and there is a partial strip of shingles at the top of the application. This is rather important, as these shingles are not inexpensive: after applying a row of shingles, cut off the remnant at the edge and use it as the next row, and use the remnants of this second row to begin another row. Abut a new strip of shingles against this partial row, and continue the process until the entire wall has been covered. Yes, this is tedious, but - trust me - your wallet will thank you in the end.
|
|
|
||||||
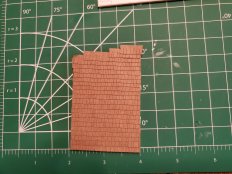
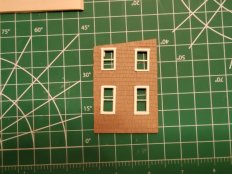
In "Wall 8 front covered" we see the entire front of the piece covered with shingles. The staggered top rows of shingles follow the angle of the wall; the very top row is to ensure that the entire wall has shingles (the result of this effort can be seen in "Windows test-fitted" - there are shingle "tabs" all the way to the top of the wall without the solid top secton of the strip showing).
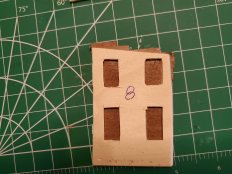
Following the example in "Back of wall 8", lay the wall face down on your cutting surface and, again, using a sharp hobby knife, and using the edges of the window/door cutouts as guides, cut the shingles out of the openings. As you cut the shingles from each opening, test-fit the window or door to ensure that it fits snugly without warping when pressed into place. If the window or door warps - that is, if the sides bow inward - whittle away a little bit of the sides of the opening and test fit the window or door again; repeat this process until the window or door fits the opening snugly without warping.
Finally, in "Windows test-fitted", we see the cutouts completed and the windows, um, test-fitted.
Repeat the preceding steps until siding has been applied to all wall sections, all window and door openings have been cut out, and all windows and doors have been test-fitted.
|
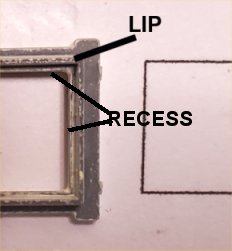
into recess on back of door or window |
TIP: Apply the glazing to the windows and doors while they are still attached to the sprues. Use a toothpick to apply a tiny bead of plastic cement to the recessess on the backs of the doors and windows and carefully lower the glazing material into the recesses, trying not to smear the glue on the glazing. Leave one or two bottom panes out to suggest open windows- my backstory for one such window is that it was my room and I liked the fresh chill of a mid-Autumn day in the air.
| Previous | Next |
Created Sunday, May 30, 2021

